Patty Saveurs
Everyday and Special Occasions Homemade Meals
Vous pouvez aussi retrouver cette page en
Homemade Pie Crust Recipe
- Details
- Patty
- Tips & Tricks

Easy pie crust recipe, I’ve been making this pie crust or pate brisee recipe for the longest time, it is flaky, buttery, perfect pie dough for sweet or savory pies, quick to make in my food processor, it has it all!
Before discovering how easy and quick it is to make pie crust, I was using store bought crust, it is so handy of course, the trouble is they are perfect for pies but they are not so easy to manipulate when you want to make hand pies or other pastries.
This pie crust is so quickly made in your food processor, you just need to work with cold butter and icy cold water.
It takes a little practice to feel exactly how much water will be needed, there can’t be a precise measure as it depends on the season and how humid the climate is in your area but it’s nothing too worrisome, I would say that if your dough is too humid, you can always knead it with a little more flour, whereas if it is too dry, it will be too hard to work with and it will break on you.
This recipe makes two 9 inch (23 cm) pie crusts.
How is this pie crust made:
- Into the bowl of your food processor fitted with the blade, add the flour, salt, cold butter cut in chunks and pulse briefly a few times until you get fine crumbs, it’s all right if you can still see some larger pieces of butter
- Add the icy cold water, start by adding 1/4 cup, pulse, then add water by the tablespoon and pulse just until the dough starts to clump when you press it between your fingers, you do not want a solid ball
- Turn the dough on your counter and press it down just to form a ball, don’t overwork it, halve the dough, flatten each portion into a round, wrap them in plastic wrap and chill for at least an hour so to let the gluten rest and the butter to firm up
- Always work with this dough cold, if it is too cold and hard to work with, let it come back to temperature a bit on your counter. On the contrary if your dough is not cold enough, chill it for a few minutes or it will stick to your counter and be a nightmare to work with
- Sprinkle your counter with some flour, roll your dough from the center towards you, turn your dough around a few times to make sure that it doesn’t stick to your counter, sprinkle more flour if needed
- This pie dough will keep for 4 to 5 days in your fridge, it can be frozen for a month
I have used this pie crust to make my Chanterelle Quiche and my Pear Almond Cream Pie, check them to see the beautiful results you can get with this pie crust.
- 2 x 9 inch tarts
- Easy
- 0 h 30
Recipe :
Ingredients:
2 1/2 cups (350 g.) all-purpose flour
1/2 tsp (2 g.) salt
1 tsp (4 g.) sugar
1 cup (2 sticks) (226 g.) unsalted butter, chilled, and cut into small chunks
1/2 cup (120 ml) icy cold water
Instructions:
Into the bowl of your food processor fitted with the blade, add the flour, salt, cold butter cut in chunks and pulse briefly a few times until you get fine crumbs, it’s all right if you can still see some larger pieces of butter
Add the icy cold water, start by adding 1/4 cup, pulse, then add water by the tablespoon and pulse just until the dough starts to clump when you press it between your fingers, you do not want a solid ball
Turn the dough on your counter and press it down just to clump it and form a ball, don’t overwork it, halve the dough, flatten each portion into a round, wrap them in plastic wrap and chill for at least an hour so to let the gluten rest and the butter to firm up
Always work with cold dough, if it is too cold and hard to work with, let it come back to temperature a bit on your counter. On the contrary if your dough is not cold enough, it will stick to your counter and be a nightmare to work with
Sprinkle your counter with some flour, roll your dough from the center towards you, turn your dough around a few times to make sure that it doesn’t stick to your counter, sprinkle more flour if needed
This pie dough will keep for 4 to 5 days in your fridge, it can be frozen for a month
Note:
For better results, always work with chilled dough, keep your dough in your fridge until needed
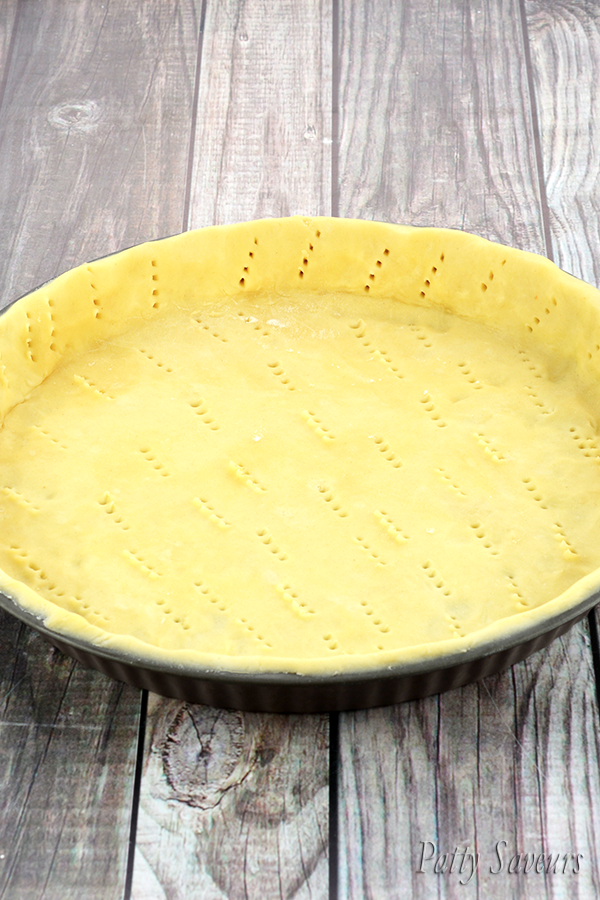
Butter your mold, arrange pastry or puff pastry dough, and press the dough down the sides as much as you can to fit. If you press down, the dough will remain as you arranged it, on the contrary if you have to draw your dough up the sides, it will shrink during baking
If your dough still overlaps the rims, don’t try to cut it at this stage
Chill molds for about 15 minutes to half an hour, first of all it will help with the baking process but also after chilling you’ll be able to cut the rims easily
Before discarding my excess dough, using cookie cutters of different size and shapes, I cut different patterns into my dough, freeze them on a tray and then store them into a plastic bag for later use, to decorate tartlets or the sides of pies, etc.
Enjoy!
Recipe inspired by Joy of Baking, please check her method here
Hello! All photos and content are my property. Please do not use my photos without prior written permission. If you wish to republish this recipe, please rewrite the recipe in your own unique words and link back to Homemade Pie Crust Recipe

 Hi, I'm Patty, welcome on my website. I am proposing quick and easy meal and dessert recipes for everyday and special occasions made with simple and delicious ingredients. Thanks for your visit, and please come back anytime for more recipes!


